
In this do it yourself renovation post, we will cover in detail how to install wall tile. For successful installation of a Wall tile, it is first important to have all the necessary tools on hand. Installing ceramic wall tile is a skill that you can learn. Tiling in the market all over the world, and quartz wall tiles are more desirable areas of paving materials for housing and commercial real estate. Shiny surfaces, patches mirror, colors and other powerful features of these tiles is to make them popular day after day.
tools and materials you need to have. It lists the steps to follow to successfully install wall tile. You will before any need for tiles, of the color and the size you want. You need tile adhesive and Grout as well as braces plastic, a little less thick tiles, all for to be able to properly attach your wall covering. Apart from these basic materials, the following supplies you will need: a reel meter, pliers Tiler, a metal ruler, a square, a spirit level, a knife, a toothed spatula and another soft, sponge and finally, a pencil. All these tools are available in specialized in DIY stores.
Once all of this material at hand, you can pass to the achievement of your wall tile itself. To be sure to succeed the laying, it is first essential to prepare the surface on which you will work. Therefore make sure that it is clean and smooth. Once this is done, begin to delineate space tile on the wall by drawing lines using the pencil and rule, making sure to be the most accurate possible. With the spirit level, draw a first horizontal line for the alignment of the first row of tiles. Then, draw perpendicular lines using the bracket. The work surface is now well defined, proceed to the wall tiles.
install wall tile – the realization
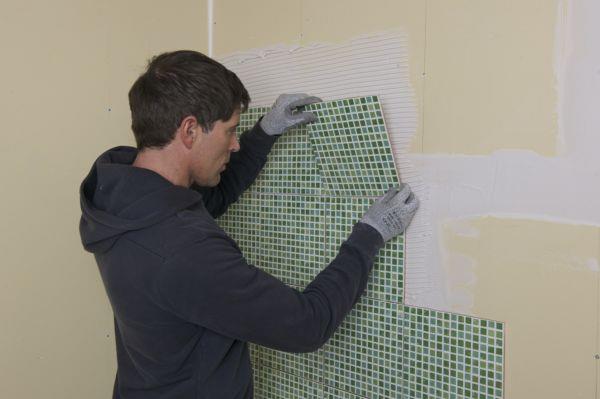
With your knife, remove the glue and then drop it onto the toothed spatula. Spread the then over the zone previously defined by circular and further movements to obtain a homogeneous adhesive layer. Once this is done, start laying the tiles in a straight line, making sure to leave a few millimeters between each of them. This small space will then host plastic braces. When all the tiles in a straight line was laid, now prepare the oblique tiling. To do this, cut triangles in the tiles. Use the Tiler, side wheel clamp, to scratch the tile, while relying on a rule. With jaw located at the other end of this same clip, break the tile with a net movement, just at the level of the scratch you just draw.
Diy- Installing Wall Tiles Review
Video on how to properly install wall tiles.
How to Install Wall Tiles
A tiled wall offers many advantages. From installing simple borders to covering half or even the whole wall, maintenance is easy ..
When all the triangles have been cut, start the oblique tiles by taking rights tiles as landmarks. Follow always the a few millimeters of space used to put the braces. To remove any excess glue, use a damp sponge. Remember to remove the small braces before the glue has set hard. When the tile is installed, let dry for 24 hours. The last step is done overnight. Prepare the grout by diluting the product according to the manufacturer’s specific instructions. Apply it then with a flexible spatula, pressing on the diagonals. Once the entire surface of the wall tile is covered, let the seal take for about 20 minutes. This time, pass a damp sponge on the tiles to remove excess joint. After 48 h, everything will definitely be dry.
install wall tile
- How to decide on the brand of air conditioner?
- Steps ideas renovation bathroom decor without cost
- PlayStation Error Code 80710723
- Forged products in the Interior
- How to change the drum bearings washing machine [repair]
- how to stop cracked glass from spreading
- Protection of pipelines against corrosion of metal plumbing
- Effectively reseal a crack on a wall plaster
- As I Avoid fraud by using a debit card
- The cause of the explosion was not devastating to the fertilizer factory in Texas so far
